


Motorized Shades Installation — Planning, Power, and Commissioning Best Practices
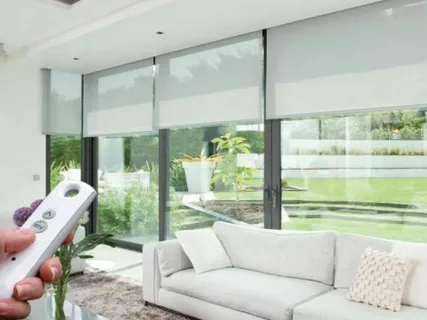
A well-executed motorized shades installation begins with careful measurement, structural preparation, and a control strategy that matches the room’s automation platform so shades operate quietly, align across runs, and integrate with lighting and HVAC for comfort and energy savings.
Plan motorized shades installation by recording reveal depths at multiple points, choosing motors sized for fabric weight and roll diameter, deciding between battery, low-voltage, or hardwired power, and selecting a control protocol that fits your automation ecosystem. Commission presets under real sun conditions and document limits, wiring, and spare parts for future maintenance.
Why Motorized Shades Installation Needs Thoughtful Planning
Motorized shades look simple but they are multidisciplinary systems that combine mechanical accuracy, electrical planning, and networked control. A successful installation starts in design and ends with disciplined commissioning and documentation. Errors in measurement, underpowered motors, or poor wiring choices become obvious only after finishes are complete and fabrics are installed. Planning early saves money by routing conduit and blocking during construction, ensuring secure mounting and clean cable runs, and by choosing motors and fabrics that match usage patterns and environmental demands. Good planning also reduces callbacks and extends the life of motors and fabric by avoiding mechanical stress and misalignment.
Pre-Installation Survey: Measure Twice, Order Once
A complete pre-installation survey documents every physical variable that affects fit and function. Measure reveal depth, width, and height at multiple points on each window to capture out-of-plumb and out-of-square conditions. Photograph window heads, jambs, and sills with measurements annotated; include trim and casing dimensions and record finished floor and ceiling heights. For continuous runs across multiple windows, record the centerline and bracket positions to ensure tube concentricity and visual alignment. Note obstructions such as transoms, molding, or nearby HVAC diffusers that change clearance needs. When a headbox or fascia is planned, confirm that the selected headbox will clear the reveal and allow service access. A robust measurement package reduces fabrication errors and speeds field installation.
Motor And Drive Selection: Torque, Duty Cycle, And Quiet Operation
Choosing the correct motor is critical for long-term performance and quiet operation. Motor torque must comfortably exceed the combined fabric weight, tube diameter, and friction expected over the lifetime of the unit. Brushless DC motors are common for residential work because they run quietly and offer long service life, while motors with soft-start and soft-stop profiles reduce jerking and fabric fatigue. For very wide or heavy shades, consider multiple motors or distributed drive systems synchronized across the tube to prevent skew and uneven fabric stacks. Duty cycle—the expected number of daily operations—should inform motor selection: high-cycle commercial environments need industrial-grade drives with robust cooling and clearly defined service intervals.
Power Strategies: Batteries, Low-Voltage Centralized Power, And Hardwiring
Power decisions shape installation complexity and maintenance burden. Battery-powered motors simplify retrofit installations and avoid running conduits through finished walls, but they require a maintenance plan to replace batteries and systems to surface low-battery warnings well before failure. Rechargeable battery packs can be centralized and swapped at planned intervals. Low-voltage centralized power supplies feed groups of motors from a remote location and reduce field maintenance while keeping cabling simpler than mains wiring. Hardwired AC is the most maintenance-free but needs electrician coordination, conduit, and adherence to local code; it is often preferred for high-use or commercial projects. Hybrid strategies—battery motors with optional backup power—combine convenience with resilience. Whatever the choice, document power plans, breaker assignments, and service access points in the handover packet.
Wiring, Conduit, And Future-Proving Your Installation
Run conduit or accessible raceways to motor locations wherever possible. Conduit improves serviceability and allows future protocol upgrades without damaging finished surfaces. When low-profile finishes preclude full conduit, use discreet surface raceways or run cables through trim channels. Separate control and signal wiring from high-voltage runs to avoid electrical noise. Include spare conductors in each run so future devices or sensors can be added without re-cabling. Label both ends of every cable with a unique ID and maintain a wiring map that becomes part of the documentation set. Planning for spare capacity at the time of construction reduces retrofit cost and preserves the investment.
Control Protocols: RF Remotes, Mesh Networks, Wired Control, And IP
Control choices determine integration flexibility. Proprietary RF remotes are simple but silo shades from other systems. Mesh protocols such as Zigbee, Z-Wave, or manufacturer-specific mesh technologies provide reliable local control and are well-supported by many automation platforms. Wired control using RS-485 or 0–10V provides deterministic response and is common in commercial installations. IP-based controllers are convenient where Ethernet backbones exist and allow centralized management and firmware updates at scale. Choose a control protocol consistent with the room’s broader AV and lighting ecosystem to enable coordinated scenes and avoid the need for additional protocol bridges. When wireless is selected, ensure adequate mesh density, use repeaters where necessary, and document network topology.
Mounting And Structural Details: Blocking, Fasteners, And Corrosion Resistance
Mounting decisions affect longevity and noise characteristics. Inside mounts can be visually clean but need sufficient reveal depth and square openings. Fascia or headbox installations conceal tubes but require secure backing and adequate service access. Always mount motors and brackets into structural backing or reinforced blocking rather than relying on drywall alone; long screws that engage into studs or blocking reduce loosening and noise. For exterior or high-humidity installations, use corrosion-resistant hardware and stainless fasteners to prevent degradation. Verify that headbox covers can be removed for service without disassembling trim and avoid micromovements that generate squeaks over time.
Fabric Selection, Stack Height, And Thermal Considerations
Fabric choice affects torque loading, UV durability, and stack height. Sheer fabrics roll into smaller diameters and are lighter but provide less thermal and glare control. Solar-control and blackout fabrics increase torque demand and stack height, which can affect transom clearance and aesthetics. Specify fabric weight per linear foot and stack height charts to inform motor choice and headbox sizing. Consider thermal expansion properties for fabrics exposed to strong sun or large temperature swings, as some materials can loosen or sag with humidity. For exterior fabrics, choose UV-stable, water-shedding materials and specify protective seals for the mechanism.
Sensor Integration And Automated Behavior
Sensors enhance value by driving shades based on real conditions. Exterior sun sensors or sun-tracking algorithms lower shades to prevent glare and reduce cooling loads, while interior ambient light sensors coordinate shades with lighting scenes for balanced illuminance. Occupancy sensors prevent automatic closure when people or pets are present and can make automations feel natural. Temperature sensors tied into HVAC controls can position shades to moderate solar gain and assist zone-level climate control. Place sensors where they measure the condition relevant to the shade’s goal, not where they are most convenient, and tune thresholds during commissioning to avoid nuisance behavior.
Commissioning: Limits, Presets, And Runtime Tuning
Commissioning is where successful design becomes reliable performance. Set accurate upper and lower travel limits to protect fabric and hardware, and tune soft-start and soft-stop profiles to ensure quiet motion. Save presets for common states such as open, privacy, glare, and presentation, and test them across different daylight conditions. Run cycle tests for high-use shades to confirm thermal behavior in motors and to uncover early wear. Validate network behavior, bridging, and scenes that tie shades to AV, lighting, and HVAC systems. Document limits and presets in the handover documentation so future adjustments are recorded.
Noise, Speed, And The Human Experience
Perception of quality depends heavily on noise and motion. Whisper-quiet brushless motors with even acceleration and deceleration create a premium experience in living areas and bedrooms, while slightly faster motion may be acceptable in lobbies. Offer configurable speed options and default to slower, dignified motion in media rooms and bedrooms. Address vibration by ensuring tube concentricity and tight bracketing, and avoid jerky starts by tuning motor acceleration profiles.
Maintenance, Troubleshooting, And Spare-Parts Strategy
A maintenance plan ensures longevity. Provide annual inspections that verify bracket tightness, tube concentricity, and fabric tension. Maintain an inventory of critical spares such as motors, universal brackets, and limit switches for rapid replacement. For networked motor controllers, schedule firmware reviews and staged updates to avoid mass regressions. Provide occupants with simple troubleshooting steps for common issues—how to manually jog motors, how to perform a soft reset, and how to safely free jammed fabric. Keep a service contact and define an SLA for high-priority failures.
Safety, Code Compliance, And Accessibility
Motorized shades on egress paths or accessible routes require special attention to ensure they do not impede escape or create tripping hazards. Provide accessible manual overrides and design failsafe behavior to keep egress clear during automation events. Follow local building codes for wiring and emergency access and ensure headbox removal for service does not affect fire-rated assemblies. For childcare or healthcare environments, design control logic to prevent entrapment and include emergency stop behavior on sensors or manual switches.
Final Thoughts On Motorized Shades Installation
Motorized shades deliver aesthetic, comfort, and energy benefits when planned and executed with attention to measurement, correct motor selection, wiring, and commissioning. The difference between a project that delights and one that frustrates often lies in the preparation work: measuring accurately, choosing motors with adequate torque and quiet profiles, running serviceable conduit, and commissioning presets under real-world conditions. With a documented maintenance plan and accessible spare parts, motorized shades become a reliable, low-maintenance part of daily life.
FAQs
How often should motorized shades be serviced?
Inspect high-use installations semiannually and typical residential shades annually. Service should include bracket security checks, tube concentricity inspection, fabric tension evaluation, and firmware updates for networked motors to catch wear early and maintain smooth operation.
Is battery power a practical option for motorized shades?
Battery power is practical for retrofit scenarios and low-use applications, but it requires planned battery replacement and awareness of temperature effects on battery life. For high-cycle areas or exterior installations, hardwired or low-voltage centralized power is generally more reliable.
What causes uneven fabric stacking and how is it corrected?
Uneven stacking often arises from tube concentricity issues, misaligned brackets, or incorrect motor torque. Correction typically involves re-leveling brackets, verifying tube roundness, adjusting tension, and ensuring motors are synchronized in multi-motor setups.
Can motorized shades help reduce cooling loads?
Yes, when integrated with sun sensors and HVAC controls, shades can reduce peak solar gain and lower cooling demand. Strategic shading during peak sun hours reduces solar heat transfer and assists the HVAC system in maintaining comfortable setpoints more efficiently.
What documentation should I receive after installation?
At handover expect measurement records, wiring maps and conduit locations, motor type and torque specs, preset values and travel limits, firmware versions, spare parts lists, and a maintenance schedule so future service and upgrades are straightforward.
Author: Lucas Hart — Architectural shading specialist focused on integrated, serviceable installations.
- Digital Agency
- Literie
- Location de voitures
- Restaurant
- Restaurant
- Mode
- Mode
- Information
- Marketing
- Tourisme
- Développement
- Découverte
- Législation
- Gastronomie
- Pâtisserie
- Evento
- Art
- Causes
- Crafts
- Dance
- Drinks
- Film
- Fitness
- Food
- Jogos
- Gardening
- Health
- Início
- Literature
- Music
- Networking
- Outro
- Party
- Religion
- Shopping
- Sports
- Theater
- Wellness
 Portuguese (Brazil)
 Indian
 English
 French
 Arabic
 Spanish
 Portuguese
 Deutsch
 Turkish
 Dutch
Dutch
 Italiano
 Russian
 Romaian
 Greek
Greek